Frunkly LT

Instructions
Installation, removal & use

Installation

  • A white car with the hood open and a front luggage compartment underneath. The car is parked on a paved parking lot with grass. License plate "HH US 425E". Text "FRUNK.LY" on the hood.

    1. remove all objects from the frunk

    To ensure that nothing gets in the way during installation, first remove all objects from your frunk.

    Don't worry, everything will find its place again in the end.

  • 2. take the bag of screws and tools to hand

  • Hand holding a small wrench in front of an open front trunk of a car.

    3. take the open-end wrench out of the bag

  • A man opens the trunk of a white car. The frunk is empty and there are markings indicating the position of screws. An image of a similar screw is shown.

    4. remove the two screws in the frunk

    You will find two screws on the bottom of the Frunk (see picture). Loosen these with the tool provided and then unscrew them completely by hand.

  • Person holding a bag of screws and a tool in front of an open trunk of a white car.

    5. stow the screws and wrenches in the bag

  • Person holding orange parts in front of an open trunk of a white car with "FRUNK.LY" written on it.

    6. remove the two short screws from the bag

  • An open vehicle front flap with a removable tool or holder labeled "FRUNK.LY", held by a hand. The second picture shows a detail of the tool labeled "LEFT / LINKS". The car number can be seen.

    7. take the left base

  • Man opens frunk of a white electric car on a paved parking lot with green surroundings.

    8. place the base frame in the frunk

    Place it on the left side and align both holes

  • Person checks frunk of a white electric car

    9. fix the frame with one of the short screws

    Tighten the screw clockwise

  • Frunk of a white electric car with open trunk in front, license plate visible.

    10. repeat the process for the right base

  • Black trunk organizer with the label 'FRUNK.LY', metal struts inside, for vehicle storage.

    (Model Y only) Attach the support struts

    Push (with a little force) the ends of each strut onto the corners of the frame.

  • Person holding a wooden plate in front of the open frunk of a white car in a parking lot.

    11. pick up the tabletop

  • A man holds a wooden panel in front of the front trunk of a white car with the trunk lid open.

    12. align the tabletop correctly

    Pay attention to the sticker on the top

  • Close-up of an open trunk of a white car, with a raised wooden platform inside. The background shows a building with red bricks and plants.

    13. position the table top

    On the back of the table top you will find two black parts, each with 2 holes. Align these so that the hinge fits between them (see picture)

  • White car with open front trunk, hydraulic jack and green bushes in the background.

    Animation - Table top positioning

  • A hand holds orange screwdriving tools in front of an open trunk lid of a white car. A house and green vegetation can be seen in the background.

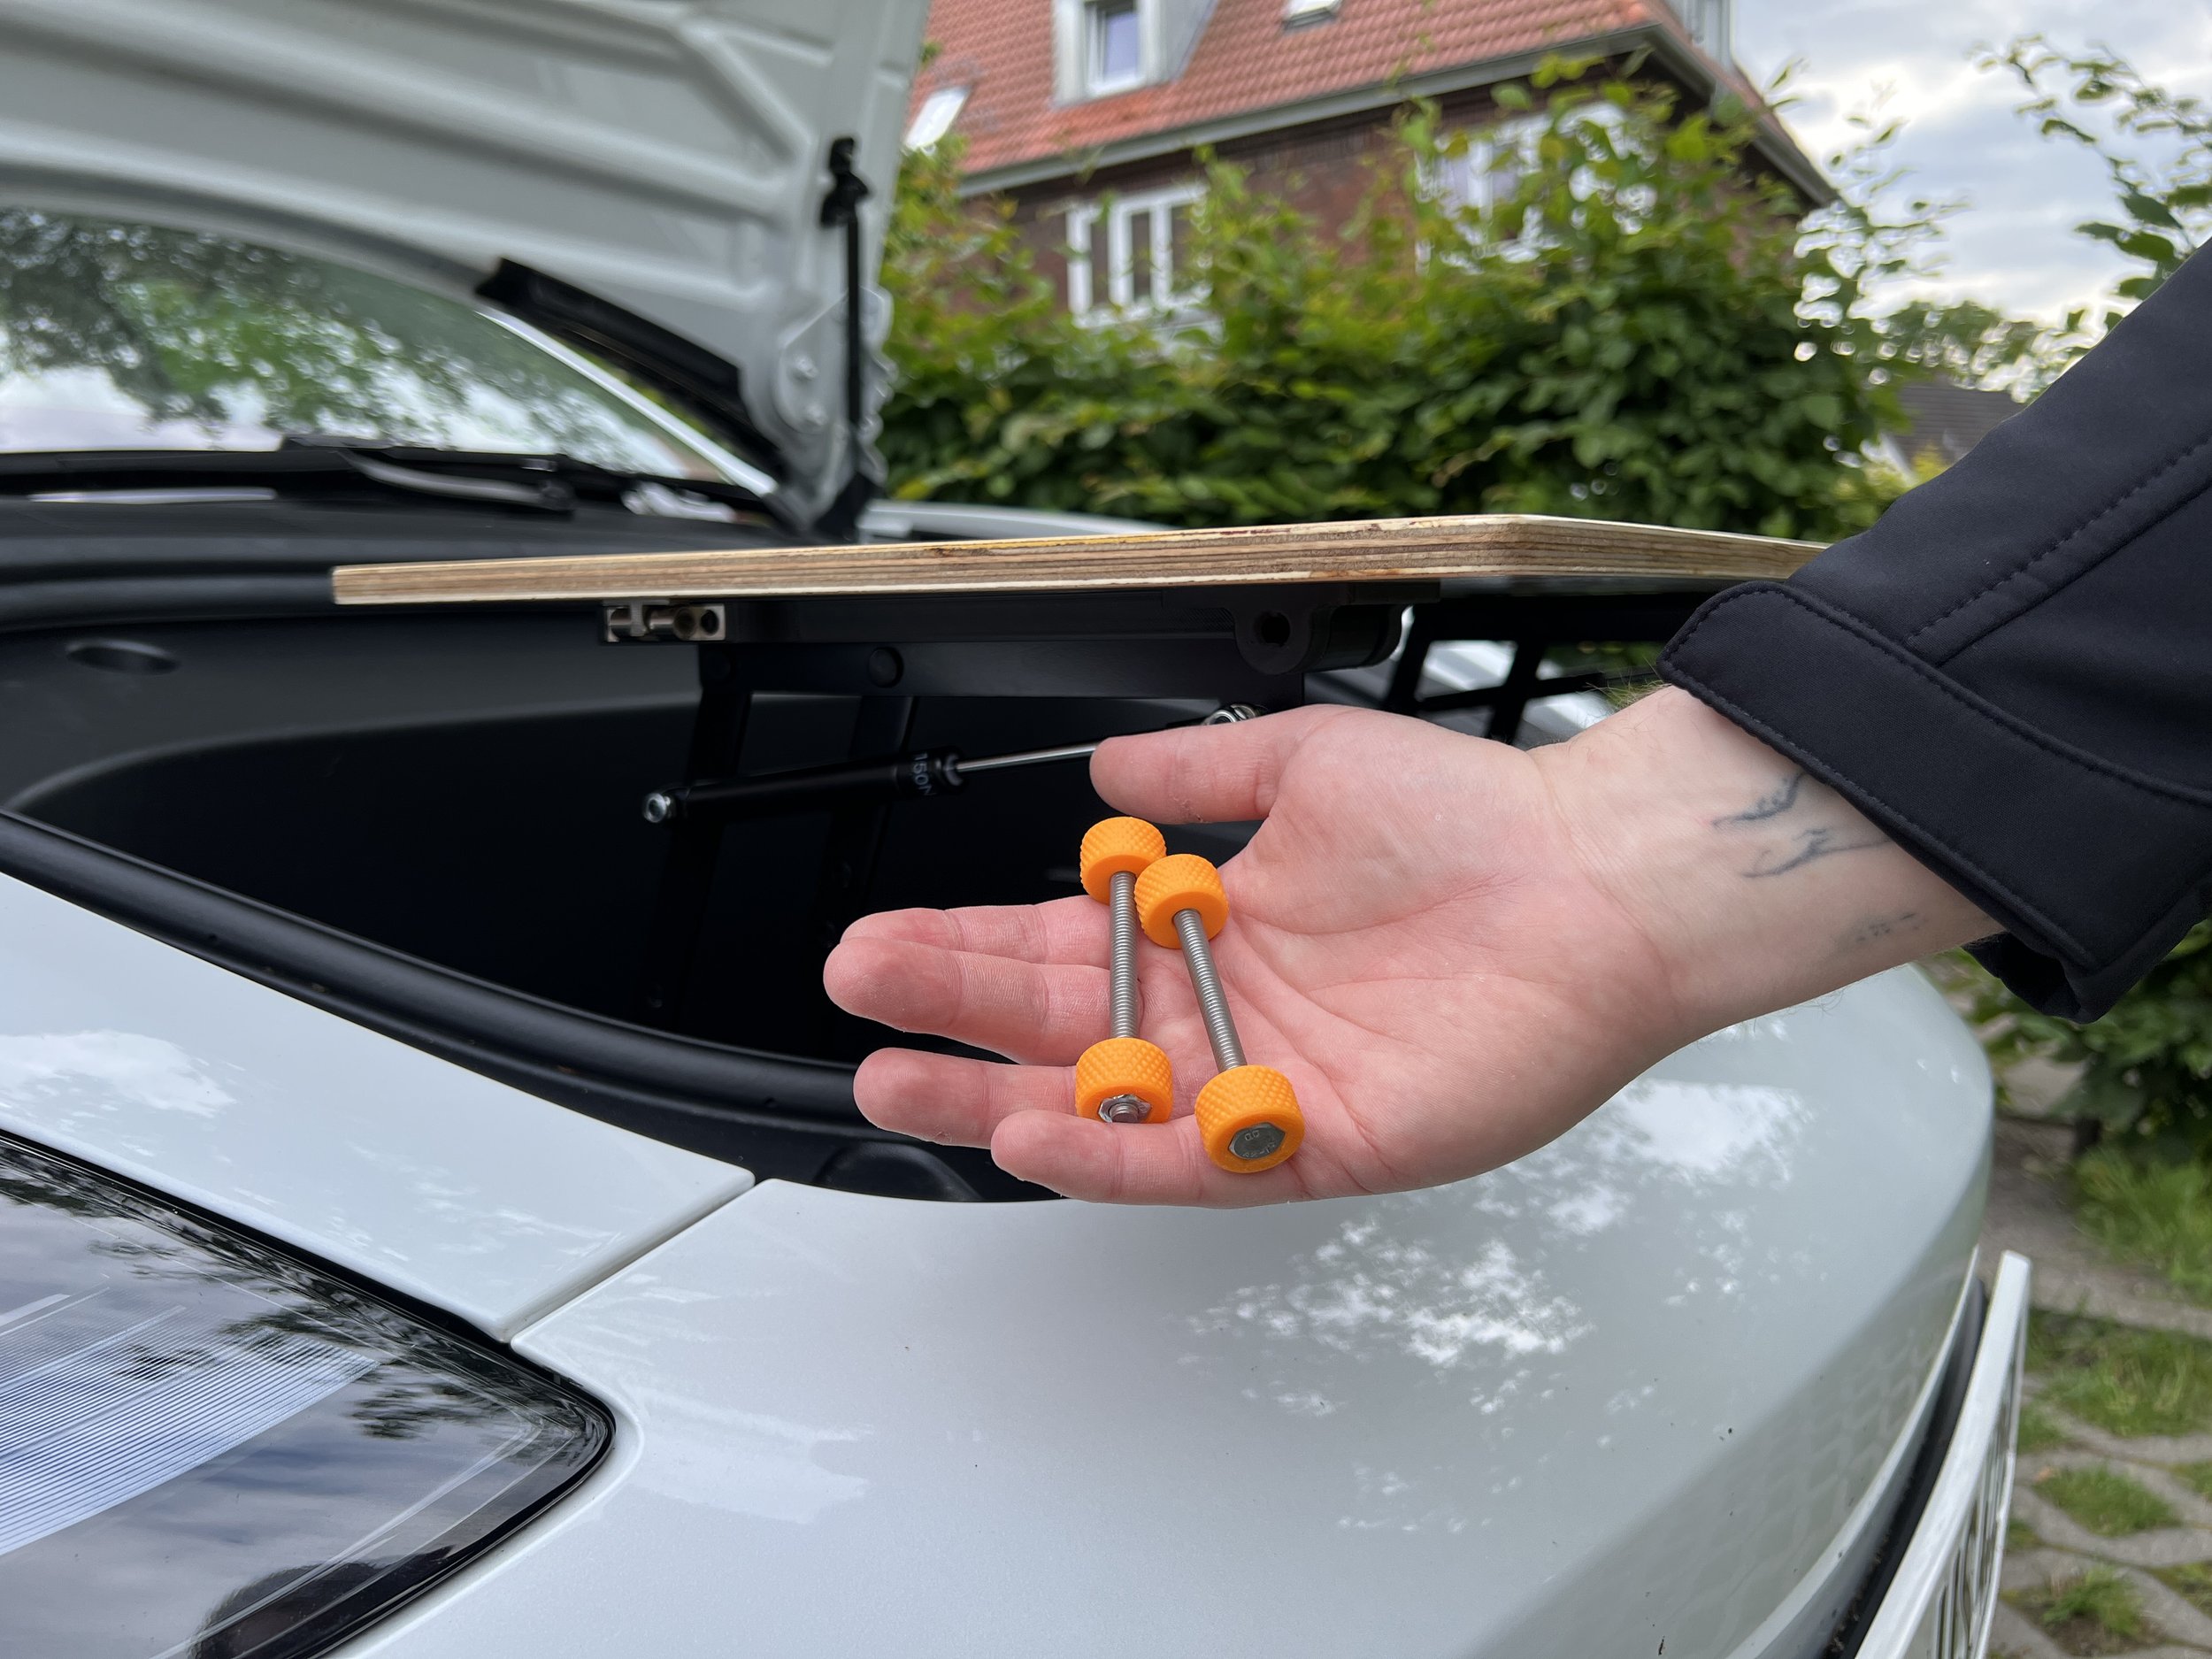
    14. take the two long screws out of the bag

  • Person fixes a wooden panel in the trunk of a car with tools, car hood open, house and foliage in the background.

    15. remove the screw nut

  • Person mounts wooden panel in the open trunk of a car.

    16. insert the first screw through all the holes on the left side

  • Hand holding wooden board with hinge in the trunk of a car.

    17. fix the screw with the nut

    Be careful not to overtighten the nut

  • Hand holding orange skateboard-like wheels in front of the open hood of a car.

    Animation - Fixing the table top (side view)

  • Person adjusts wooden shelf in a car, with screw and screwdriver.

    18 Repeat the process for the right side

  • Person mounting a table or shelf on a car (presumably on the tailgate). Two screws in hand, one near the roof of the car. Background shows a tree and bushes.

    Animation - Fixing the table top (front view)

  • A white car with an open frunk (front trunk) containing a wooden panel. The license plate shows "HH-US 425 E". The lettering "FRUNK.LY" is visible near the headlight.

    19. ready!

Setup for use

  • Person places wooden tray in the front trunk of a white electric car.

    Animation - Structure

  • A man places a wooden board in the front trunk of a white car.

    1. grip the tabletop on the left and right

  • A person stands next to a car with the frunk open. The person places a wooden board in the front trunk of the car, possibly for organization or storage.

    2. pull the tabletop upwards

  • Person inserts wooden board into the frunk of an electric car.

    3. make sure that the metal catches at the back are connected to the hinge

Disassembly

  • An open frunk of a car with a wooden board inside.

    Animation - Dismantling

  • Person places a wooden board in the frunk of a white car on a paved square.

    1. grip the tabletop on the left and right

  • Person places wooden panel in the front trunk of a white car, open hood, headlights visible, inscription 'FRUNK.LY' on the car.

    2. release the snap lock by pushing the front of the plate down slightly

  • A person places a wooden board in the front trunk of a white car with an open frunk, in a parking lot.

    3. push the tabletop down into the frunk

Access Frunk

  • A car with an open frunk in which there is a wooden cover and the word "FRUNK.LY" can be seen on the hood.

    Animation - Access Frunk

  • A man places a wooden board in the frunk of a white electric car with a German license plate.

    1. pull the table top out of the frunk

    Do not let the metal catches snap into place

  • Person holding a wooden panel over the front trunk of a white electric car.

    2. fold the tabletop forwards

  • A white car with an open hood shows an unfolded table in the front trunk.

    3rd table open

    Please note that the table is most susceptible to damage in this position. Do not lean on the tabletop.